

How To Repair Rear Window Defroster Wire
Repair a Rear Window Defogger
Option upward an inexpensive defogger repair kit and complete the repair in less than xxx minutes.
Every editorial product is independently selected, though we may exist compensated or receive an chapter commission if you purchase something through our links. Ratings and prices are accurate and items are in stock as of fourth dimension of publication.
Introduction
Fix your rear automobile window defogger apace and easily with an cheap repair kit. No special skills needed.
Materials Required
- Defogger repair kit
Terminal summertime you lot loaded your SUV to the gills with antiquarian furniture. You slammed the back hatch and off you went. Nothing was hitting the rear window before yous left, or so you thought. Only now that it's November and the temperature is tumbling, you lot observe the rear window defogger or car window defroster isn't working.Checking the rear window, you realize that y'all broke off one of the electrical tabs for the defogger. Plus, ane of the grid lines is scratched. There's no need to fork over the greenbacks for a new window or pay someone to ready it. You can ready both of these issues yourself for less than $xv.
Repair broken electrical contacts on your defogger or car window defroster
Virtually auto parts stores stock rear window defogger repair kits. The two most popular are the Permatex Complete Rear Window Defogger Repair Kit No. 09117 and the Syon Rear Defogger Repair Kit No. 38-8434. Nosotros selected the Permatex kit because it's widely available and is a complete kit for both repairs. The instructions aren't as consumer friendly as we'd like, but the kit performed flawlessly.The kits cost less than $20 and include repair instructions. If you lot only need to repair the tabs, buy the Loctite Rear Window Defogger Tab Agglutinative No. 21351.
Project step-past-step (6)
Step i
Sand the Tab
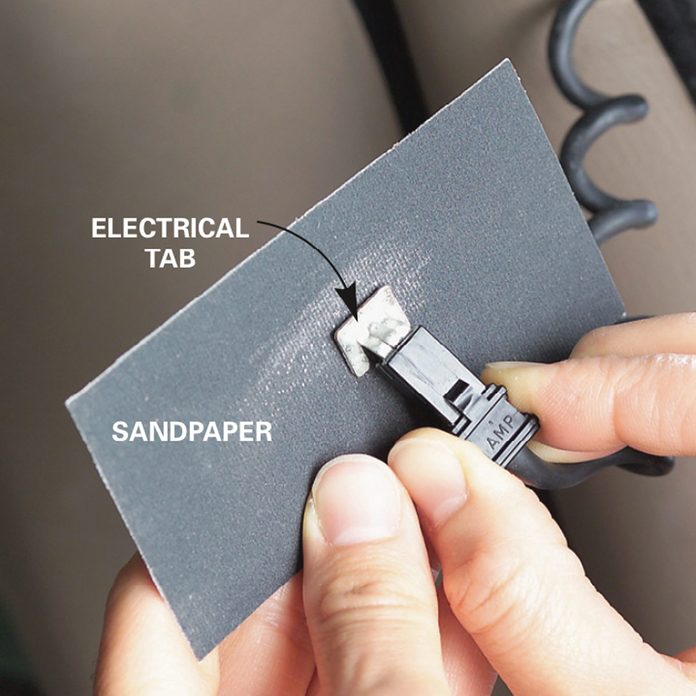
Even though the electrical tabs are soldered onto the defogger grid at the factory, avoid the temptation to solder the replacements. If the heat cracks the drinking glass, you will have to purchase a new window. Using the sandpaper from the kit, sand the rough solder surface on the loose tab. Utilise the booze prep to clean the tab and the grid area where the tab bankrupt off.
This Like shooting fish in a barrel Fox Will Defrost Your Auto Window In Seconds
![]()
Step 4
Attach the Tab to Your Machine Window Defroster
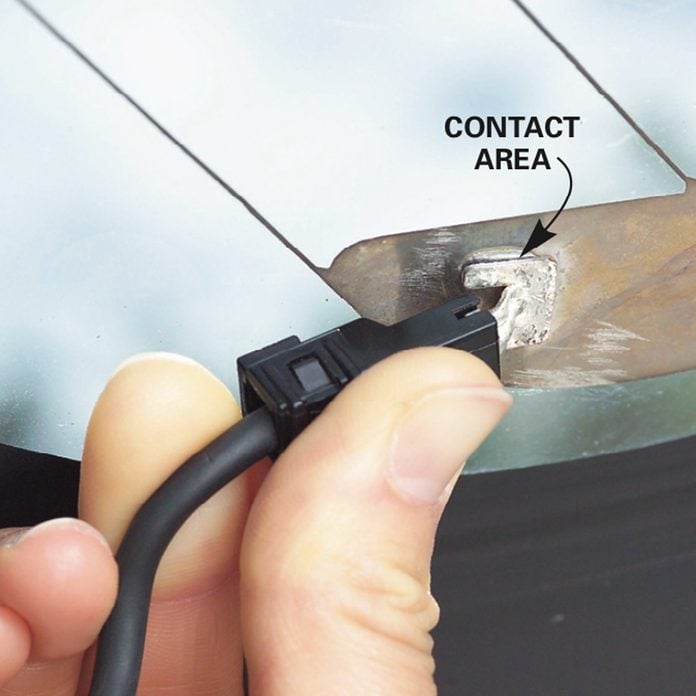
Press the tab onto the contact expanse. Hold it in place until the adhesive sets upwardly, usually about two minutes. Await 24 hours to utilize the defogger.
How to Clean and Restore Car Headlights
Step v
Repair a Cleaved Grid Line On Your Defogger: Paint a New Line
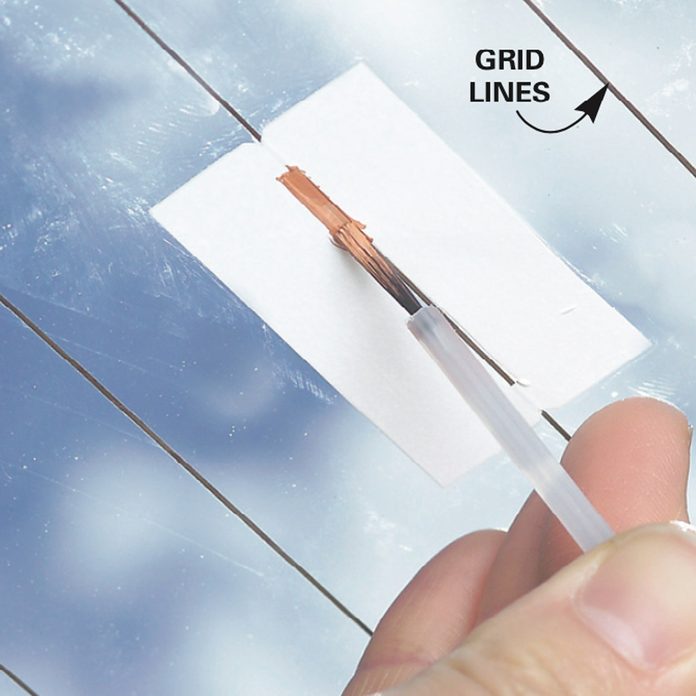
Repair a broken filigree line by cleaning the area around the break with the booze prep. Permit to dry. Peel the wax paper liner off the stencil and apply the sticky side to the glass, adjustment the stencil to the existing grid line. Brush on the conductive paint. As with the tab repair, let it dry for 24 hours before using the defogger.
To repair the grid line on your defogger, merely adhere the supplied stencil to the broken grid section and paint on the electrically conductive paint. Allow information technology to dry out, and so remove the stencil. Yous may want to touch up your piece of work with a single-edge razor blade. Just exist careful. You don't desire to impairment any other grid lines.
We completed both repairs in less than 30 minutes. Nonetheless, the instructions warned us to wait 24 hours to exam the defogger. One last note: You can only practise this repair when the temperature is above 50 degrees F.
Top 5 Tips to Get Your Car Gear up for Winter Driving

Source: https://www.familyhandyman.com/project/repair-a-rear-window-defogger/
Posted by: smiththerhatim.blogspot.com
0 Response to "How To Repair Rear Window Defroster Wire"
Post a Comment